
Have you installed a solar array and wondered how to charge your batteries for backup power? The purpose of the battery system is to ensure a high-quality and consistent energy supply.
When installing the solar panels and planning to charge the batteries, you must have the right tools. In this guide, we discuss the step-by-step process for charging the batteries with the solar panels. Let’s understand it in detail!
How Does Solar Battery Charging Work?

If you are wondering about the whole process, it is pretty simple and listed below.
Sunlight → Solar Panel → Charge Controller → Battery → Inverter → Electrical Loads
Each system and device has its own role, as discussed:
- Solar panels capture the sunlight and produce the energy.
- Charge controllers help control the energy production and consumption.
- Batteries help store the energy produced through the solar panels.
- Inverters are the backbone of the system, involved with battery charging, energy consumption, and high efficiency.
Components Required for Battery Charging
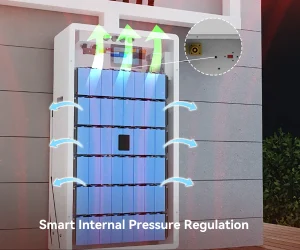
Before you continue charging the batteries, you must have the following components ready. Here is the comprehensive list.
Solar Panel
Solar panels come in various types and generate energy during peak sunlight. Prefer monocrystalline solar panels over polycrystalline panels.
Here is how solar panels help charge.
| Solar Panel Size | Typical Daily Charging Capability |
| 20W | Small electronics |
| 50W | Small batteries |
| 100W | Medium battery systems |
| 200W | RV batteries |
| 400W+ | Home battery banks |
Solar Charge Controller
The solar charge controller is also a crucial component and does the following tasks.
- Prevents overcharging
- Prevents deep discharge
- Regulates charging current
- Extends battery lifespan
- Improves charging efficiency
There are two key types of solar charge controllers.
PWM (Pulse Width Modulation)
PWM is not very efficient and has a few advantages regarding solar technology. Here are a few pros.
- Affordable
- Simple installation
- Good for small systems
It is the premium choice for:
- 12V systems
- Small solar arrays
- Budget installations
MPPT (Maximum Power Point Tracking)
It is the most efficient and widely used technology for optimal energy production and high solar efficiency.
Here is the list of benefits associated with the MPPT technology.
- Higher efficiency
- Faster charging
- Better in cloudy weather
- Works with higher-voltage solar panels
It offers the best value in the following systems.
- Large systems
- Lithium batteries
- Off-grid homes
- Commercial installations
Battery
There is a wide range of battery technologies and options. We have compared and listed the key types below.
| Battery Type | Solar Compatible | Lifespan |
| Flooded Lead Acid | Yes | 3–5 years |
| AGM | Yes | 4–7 years |
| Gel | Yes | 5–8 years |
| Lithium Iron Phosphate (LiFePO4) | Excellent | 10–15 years |
Solar Cables
Solar cables are media to carry the current. However, the right cables ensure the right voltage and current are carried. They avoid sudden drops in the voltage. Therefore, you should choose the right solar cables.
However, depending on your environment, here are a few instructions regarding the solar cables.
- UV resistant
- Outdoor rated
- Waterproof connectors
- Correct wire gauge
Fuse or Circuit Breaker
Fuses and circuit breakers are the safety players in this process. They monitor current values and respond when the current exceeds or drops below their threshold.
They are often present between:
- Solar panels and charge controllers
- Charge Controllers and batteries
Here are a few cases in which they automatically respond and ensure safety.
- Short circuits
- Reverse current
- Electrical faults
Step-by-Step Guide to Charge a Battery with a Solar Panel

Are you ready to explore various steps to charge your batteries with a solar panel system? Let’s discuss the following steps to understand the whole process.
Step 1: Determine Battery Voltage
The first step is to measure and know the battery voltage. Here are a few common configurations.
- 12V
- 24V
- 48V
Do you know the purpose of understanding battery voltage? Here are a few key reasons.
- You get compatible charging components.
- It is easier to charge batteries with the right voltage and solutions.
- Overcharging and undercharging cases are very rare.
Step 2: Calculate Battery Capacity
Calculating battery capacity is simple. It is often measured in amp-hours.
Suppose an example of a battery capacity of 12V 100Ah. Do you know the energy capacity?
It is straightforward to calculate. It measures
12 x 100 = 1200 Wh
As per the example, your battery can store 1.2 kWh of energy.
Step 3: Select the Correct Solar Panel Size
Selecting the correct solar panel size is essential. For example, let’s decode the right solar size that could charge the batteries within the best possible timeframe.
Example:
Battery:
- 12V
- 100Ah
Energy:
- 1,200Wh
If using a 200W solar panel, the charging time would be:
- 1,200Wh ÷ 200W = 6 hours
Considering system losses, solar panels can have some shadows or bad weather. However, the actual charging time in such a case is around 7–8 hours of good sunlight.
Step 4: Install the Charge Controller
The Charge Controller is very helpful for proper battery charging.
You should install it in the following locations.
- Near the battery
- In a dry location
- Away from direct sunlight
- With adequate ventilation
Step 5: Connect the Battery First
When connecting your solar panels and batteries to the charge controllers, you should connect the battery first. Then you can connect the solar panels.
Step 6: Verify Charging Status
Whenever you are charging, a few things appear on the controller display. These are:
- Charging icon
- Battery voltage
- Solar input voltage
- Charging current
- Battery percentage (on supported models)
Step 7: Monitor Charging Progress
Proper monitoring ensures the safety and efficiency of the charging and discharging systems. Here are a few things to monitor during the charging process.
- Battery temperature
- Controller status
- Cable connections
- Solar panel cleanliness
Conclusion
Always buy a high-quality battery system that offers deep charging and discharging cycles. Use the right options, such as a solar panel, charge controller, battery, and properly sized wiring to charge your batteries. Also ensure compatibility of the backup batteries according to your homes, RVs, boats, cabins, and backup power applications.
If you are looking for high-end inverters for battery storage, optimization, and efficient consumption, you are at the right place. Luxpowertek features next-gen technology inverters. Our premium range offers top-notch, premium-quality inverters. Contact our experts regarding your inverter solutions!